
In the past couple of months, the Oyster Team has made key advancements and suffered many setbacks. Specifically, we successfully assembled our 3D printed water pump, which actually worked when we attached it to a power source, and we were able to attain a much improved 3D oyster model by employing the services of our EDI colleague, Stinson Moss. We also faced many setbacks: we found that the 3D printed impeller did not fit tightly onto the motor axle; waterproofing an open DC motor is challenging, and constructing a filter has been as successful as we would like. I am going to discuss each roadblock in detail so that you may gain an understanding of our troubleshooting methods.
In regards to the fit of the impeller, we attempted to mitigate this issue by implementing a set screw in the side of the impeller body. However, we faced issues in TinkerCad (some probably from misjudging measurements), and the newly printed impeller contained a hole that did not contain screw threads or fit the screw itself. We solved this issue temporarily by physically carving out less PLA filament in the newly printed impeller so that motor axle fit snugly in the impeller body (we had to do this for the original impeller because the hole in the impeller body was marginally smaller than the diameter of the axle).
After figuring out the impeller issue, we did research on how to best waterproof the pump. The original plan was to assemble the 3D printed pump and test its capacity for moving water. Our motor, a 775 DC motor, had open areas for exposed wrapped copper wire for cooling purposes. If water found its way into the wire, it would be a problem for our pump system. Generally, most people mitigate this issue by wrapping the motor in electrical tape and stuffing it in a canister full of wax. If this renewed wax system was tested outside of the water, the wax would melt after a few seconds due to a lack of cooling outlet (placing it in water would cool it). At this point of the project, we decided to table our efforts in waterproofing, focusing them on a central point of the project, the filtration process.
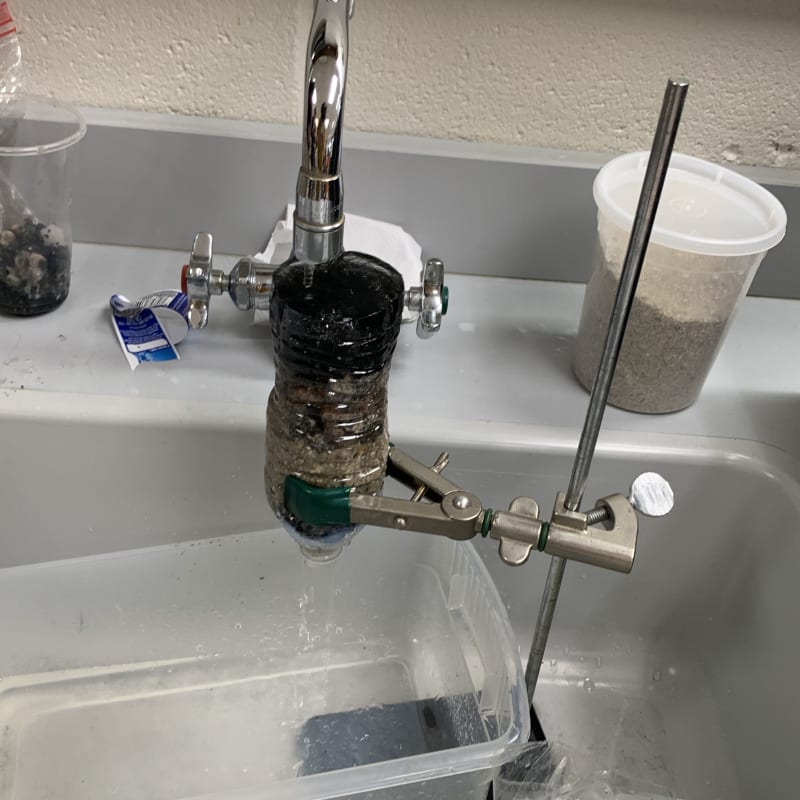
Our plan in approaching the filtration engineering process was to run murky lake water through a basic filter that consisted of five layers of material. These layers consisted of pebbles, smaller pebbles, sand, activated charcoal pellets, and cotton. We were not planning on using this filtration system within the oyster, as it would be too large. We just wanted to reach the basic milestone of filtering water before refining our design. I am not sure if it was the quality of the sand, the dust on the charcoal, or the dirt on the rocks, but the lake water that we ran through the filter became physically murkier. We tried rinsing out the filter to clear some of the dust and dirt, but our later trials remained unsuccessful. Now, we are looking at trying out other types of filters, like a microfiber filter that can be found in a lifestraw or an aerogel filter that can remove dye from water.
From the beginning, I envisioned this project to not only be an engineering project, but an educational one too. For the past couple of months, we were heavily involved in the engineering process, but now we are turning our attention to the educational process. What is the point of engineering if it does not demonstrate or fit the educational mission? From here, we are becoming increasingly aware of avoiding “over-engineering,” as we have limited time and would like a working model soon. It will be interesting to see where we end up in the next couple of months, but I hope that we can complete a majority of the project before the start of the new school year.